
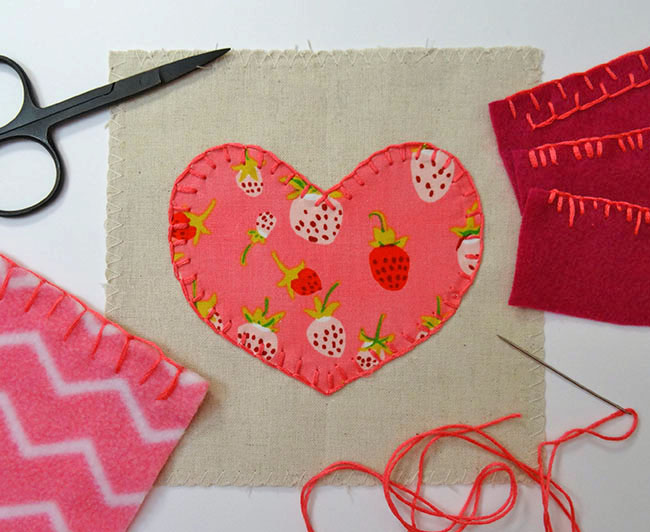
There’s no beating the clean look a blanket stitch makes, but let’s be clear: it should not be reserved only for blankets. It’s useful in so many projects, whether you want to use it on pillowcases and tea towels, to finish embroidery hoops or to attach a decorative piece of appliqué. This post can help you perfect your blanket stitch.
When doing a blanket stitch, it’s best to use embroidery thread or yarn, since this is a decorative stitch and the thicker thread stands out more. Match the weight of your thread to the weight of your fabric (aka embroidery thread for linens and yarns for heavier wools and fleece), and go with the color that speaks most to you, be it a matching or contrasting choice.
The steps below walk you through the basic blanket stitch, then show you how to use it to finish a raw edge, a folded edge and to add appliqué — along with a few decorative variations to boot.
How to Sew a Basic Blanket Stitch on a Raw Edge
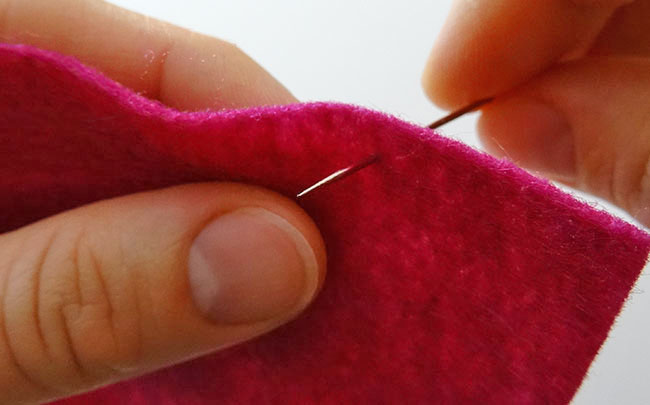
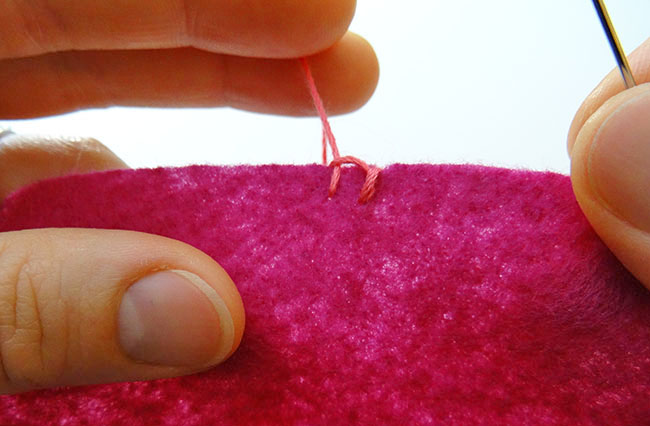
1. Collect your fabric, a needle and thread. Thread the needle and make a knot in one of the tails.
2. Begin on the right side of your fabric. Bring the thread up from the back so the knot is hidden. If you’re working with two layers of fabric, bring the thread up between the layers to hide the knot completely.
3. Pull the thread all the way through. Hold onto the thread as you pull so the short tail doesn’t become unthreaded.
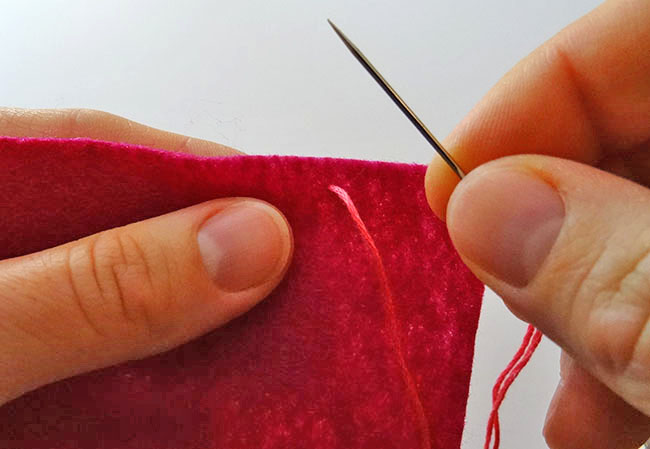
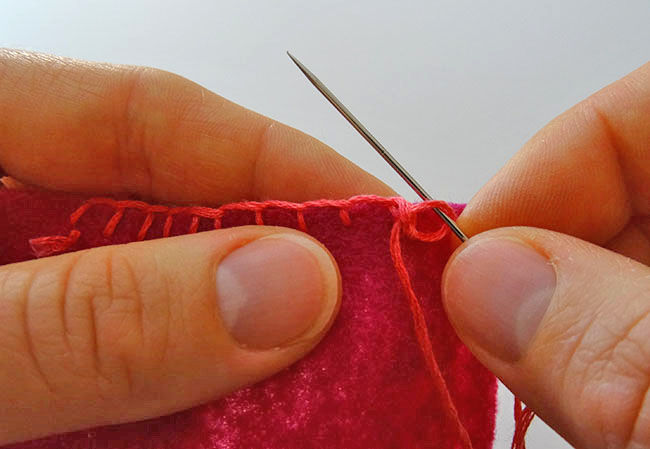
4. Take the thread around to the back of the fabric and bring it up to the front again through the same hole.
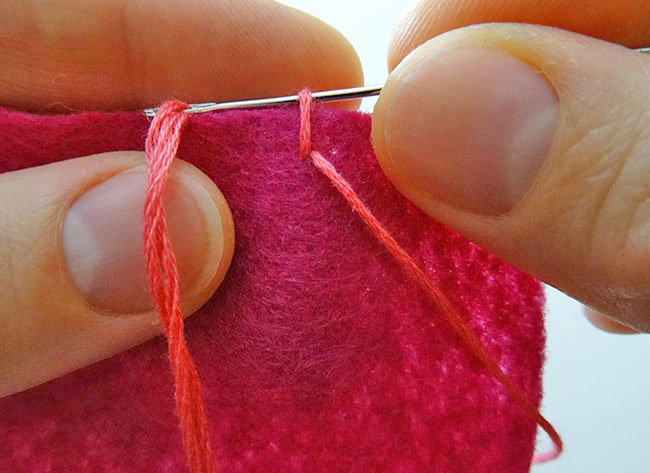
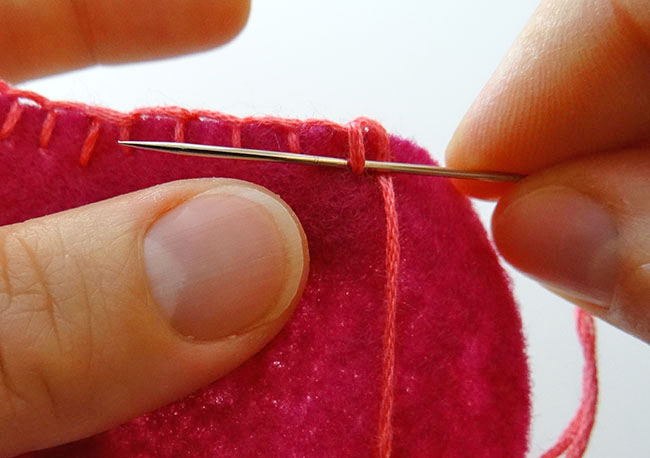
5. Bring the needle through the stitched loop, from left to right, along the edge of the fabric.
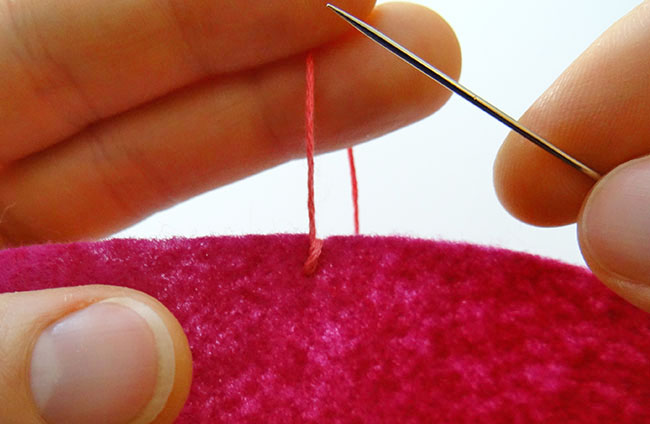
6. Pull the thread straight up to tighten the stitch.
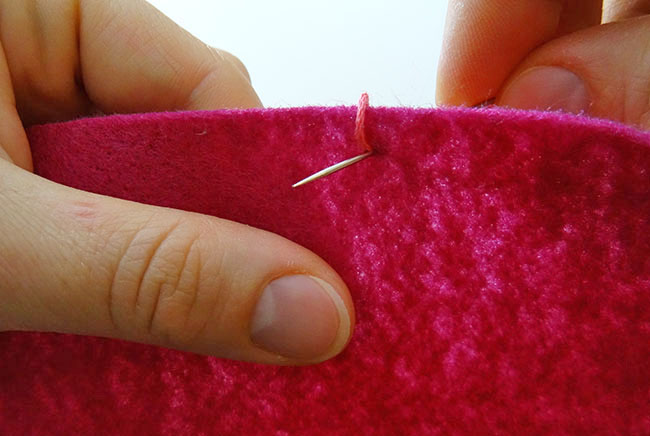
7. From the back, take another stitch about ¼” or so to the left.
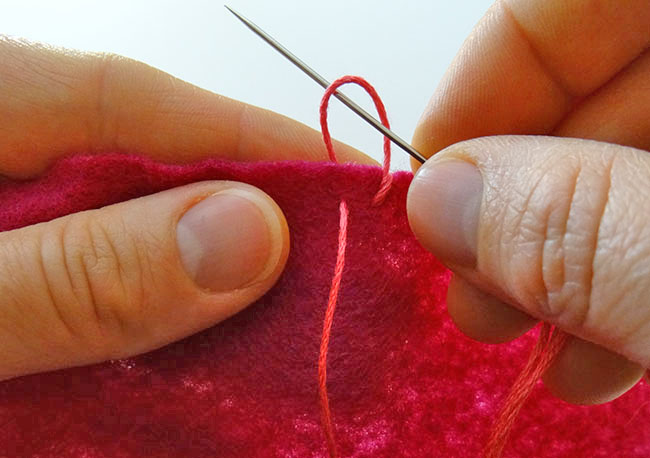
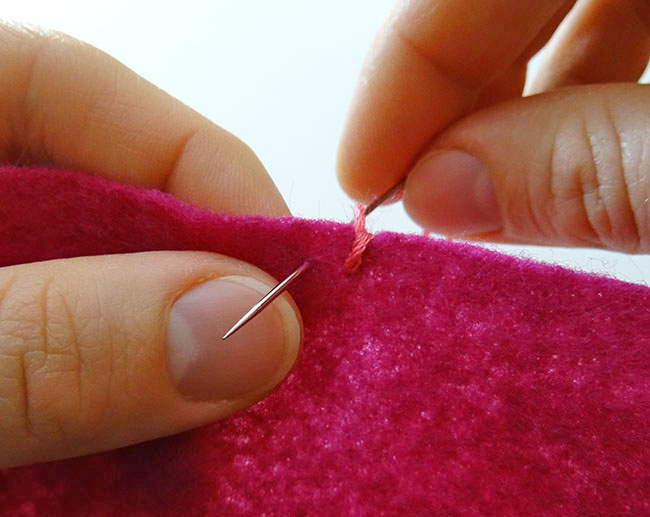
8. Pull the thread almost all the way through, leaving a loop. Bring the needle through the loop from front to back.
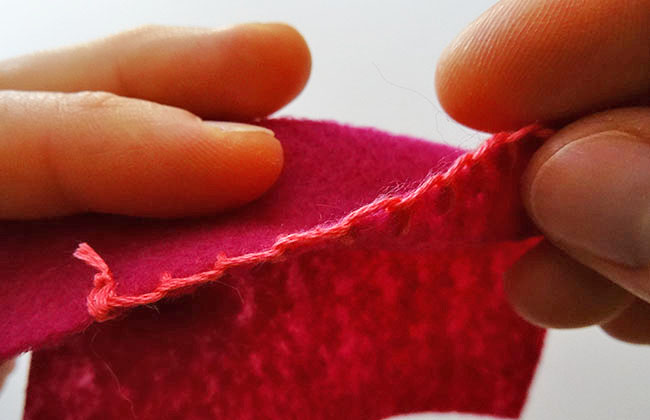
9. Gently pull the thread tight to complete the stitch. Continue sewing stitches to the left until your edge is finished.
10. To finish your row of blanket stitches, bring the thread to the back through the bottom of your last stitch.
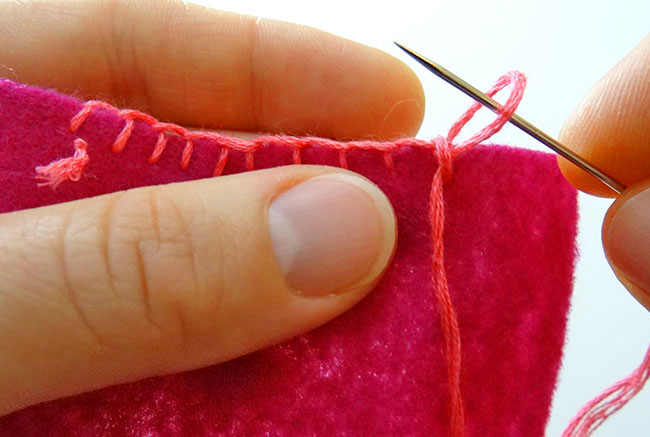
Create a knot by turning the fabric over to the wrong side. Bring the thread through the bottom of your last stitch, leaving a loop. Bring the needle through this loop.
Pull gently to tighten.
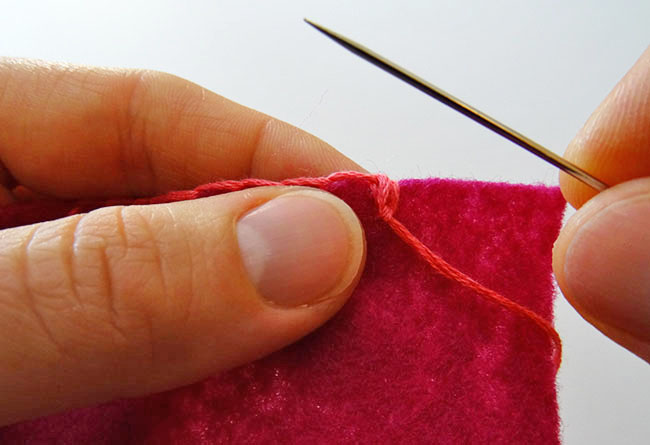
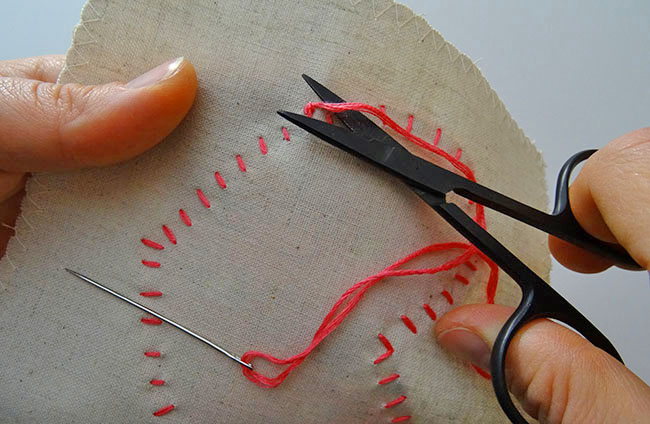
 11. Repeat to create a second knot for extra durability, then clip the threads.
Pro Tip: If you’re having trouble keeping the stitches even, try using some low-tack or washi tape. Place the tape along the edge to keep the stitch depth the same. Better yet, find tape with dots or markings to help keep the width of your stitches even too.
That’s it!
How to Use a Blanket Stitch to Finish a Folded Edge
A blanket stitch combined with a folded edge creates a professional look with an even tidier finish. Here’s how to do it.
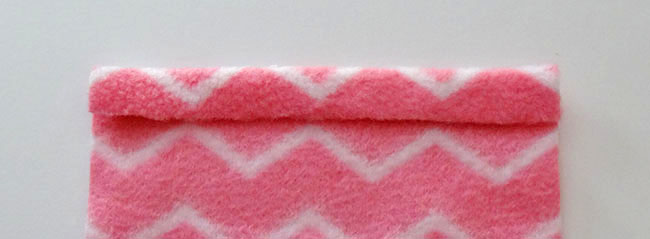
1. Fold the raw edge of your fabric under ¼”-½”, depending on the scale of the item you’re working on. Press the edge to hold it in place.
2. Begin the blanket stitch by hiding the knot under the folded fabric.
3. Use the basic blanket stitch instructions above to finish the edge. Create stitches that are as deep as the folded edge, enclosing it with the stitches. Make sure to run the stitches along the edge of the fabric evenly for the best results.

Appliqué With a Blanket Stitch
Using a blanket stitch along the edge of an appliqué covers the raw edge, prevents fraying and looks amazing.
1. Fuse the shape you are appliquéing to the background fabric. Use fusible web and follow the manufacturer’s instructions.
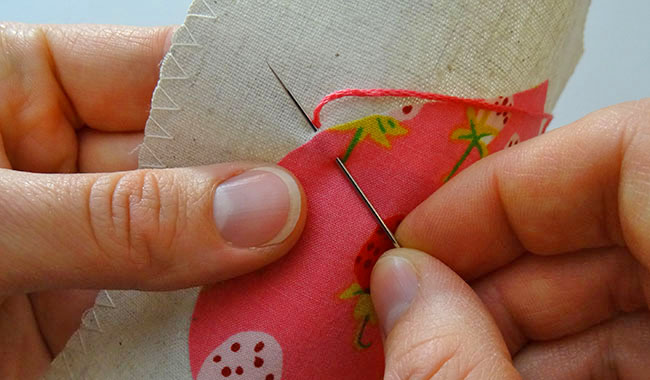
2. Begin your blanket stitch behind the background fabric to hide the knot. Stitch down through the appliqué, and back up at the raw edge.
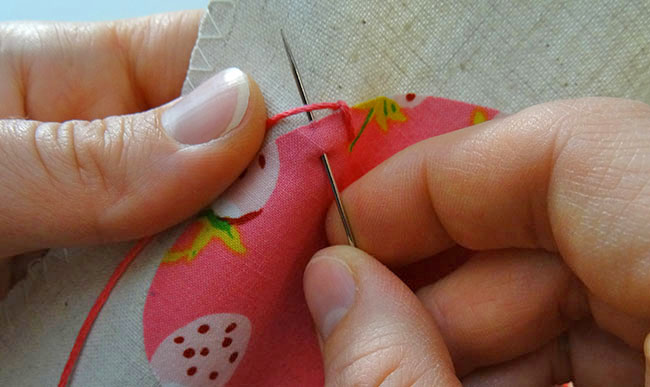
3. Take another stitch to the right of the first one. Pull almost all the way through, leaving a loop.
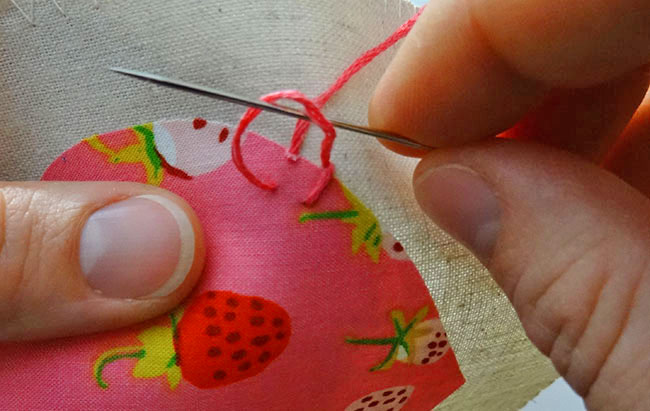
4. Bring the needle through the loop, then pull gently to finish the stitch. Repeat around the entire appliqué.
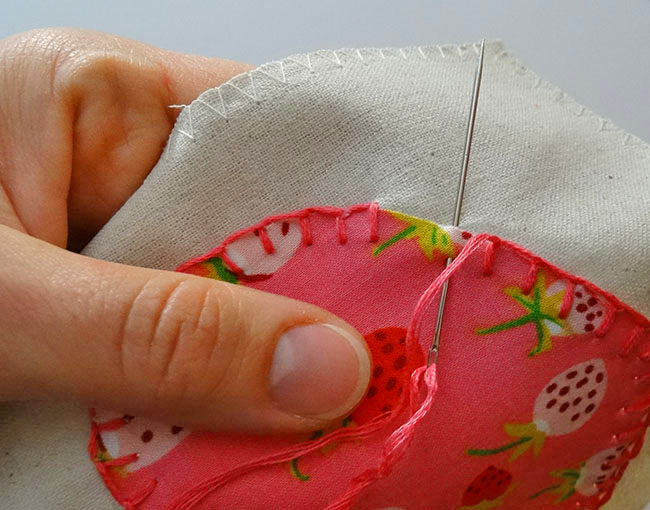
5. Space your ending stitches so they fit evenly in the remaining space.
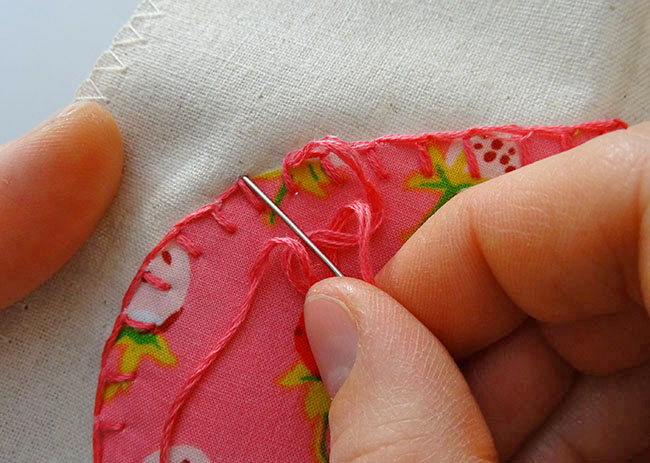
6. Stitch to the back of the appliqué to finish.
7. Make a knot and clip the threads.
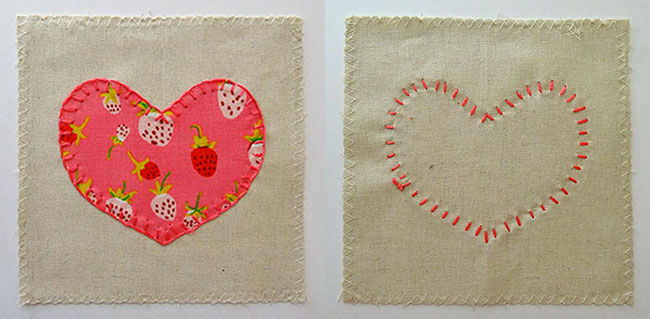
Ta-da!
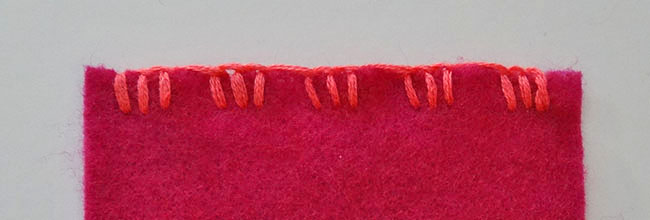
Decorative Blanket Stitch
You don’t have to stick with the same even stitches when making a blanket stitch. Check out these decorative variations for your projects.1. Vary the Stitch Depth
This will give you a curved or scalloped edge.
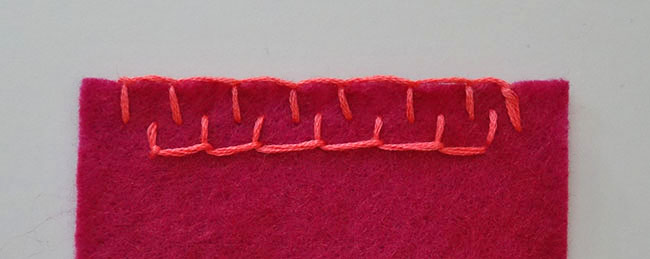
2. Group Stitches Together
Have fun with patterns!
3. Stitch Interlocking Rows
This will create a double blanket stitch.
However you stitch it, the blanket stitch can be your new go-to for decorative finishing!
How do you determine how much floss or yarn you need to go around the edge of a blanket!