
No quilt is complete until it has a label. A record of when the quilt was made and by whom is so very important. Making a quilt label might not be something new quilters give much thought to, but it should be. Doesn’t an artist sign her work? Doesn’t a writer sign his name? Why shouldn’t your quilts be signed as well?
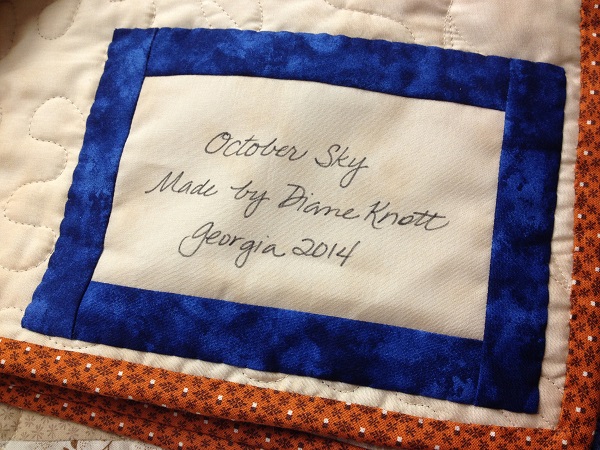
Photos via Butterfly Threads Quilting
A bit about making quilt labels
Thanks to modern technology, there are lots of options for making a quilt label. Fancy computer printed labels, preprinted labels and custom embroidered labels are all available. It really is just a matter of personal preference.
But, in my personal opinion, if you made the quilt, shouldn’t you make the label? Wouldn’t your children or grandchildren prefer your handwriting over a computer font? Depending on who will be receiving the quilt, and what it will be used for, will certainly influence these choices.
The quilt’s purpose will also determine what information should be included. Obviously, the name of the quilter, the date and the location the quilt was made are basic details to include. If the quilt is a gift, the recipient’s name can be included. If the quilt celebrates a special occasion or event, that should be included as well. Often times, special quotes or Bible verses are included on the label. It really is important to think about what someone in the future might want to know about this quilt.
[box type=”shadow”]
For more information on the different labeling options, check out this reference piece on creating quilt labels from Bluprint blogger Sherri McConnell.
[/box]

Image via Bluprint blogger Sherri McConnell
Making your own quilt label is easy! Follow these simple steps:
Supplies needed:
- Permanent marking pen
- A small piece of fabric, 4″ x 6″ or 5″ x 7″ is good
- Freezer paper for stabilizing fabric while writing, 4″ x 6″
- Leftover fabric strips from the quilt top, 1 1/2″ wide
- Needle and thread, for attaching the label to the quilt

Step 1:
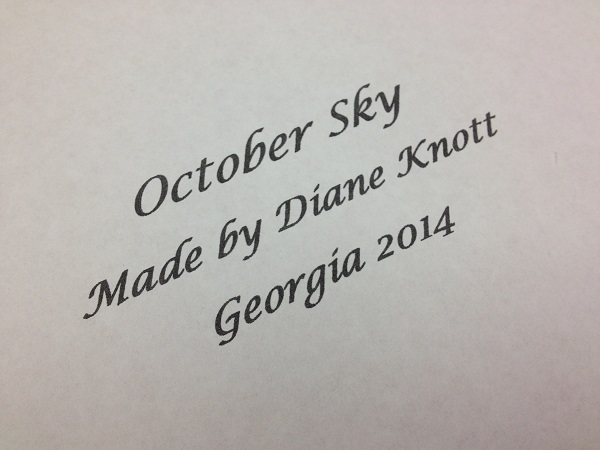
Make a computer printout of the contents of the label and how you would like them to appear. Simply type the information on the computer, adjust the size and arrange the words to fit the size of the label, then print it out on paper. This will serve as the handwriting pattern.
Step 2:
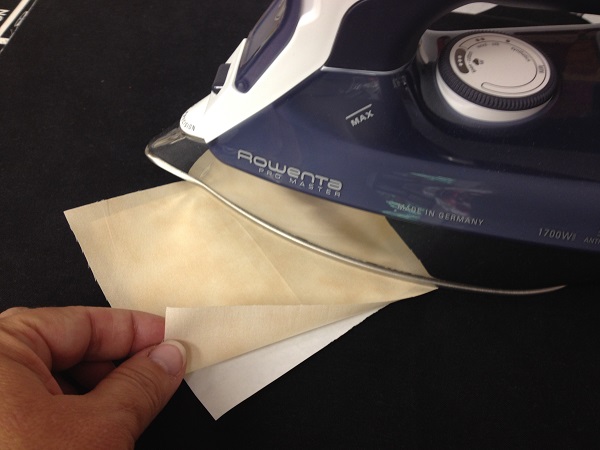
Prepare the label fabric by ironing the wrong side to the shiny side of a piece of freezer paper. The freezer paper stabilizes the fabric, so it won’t shift while it is being written on.
Step 3:
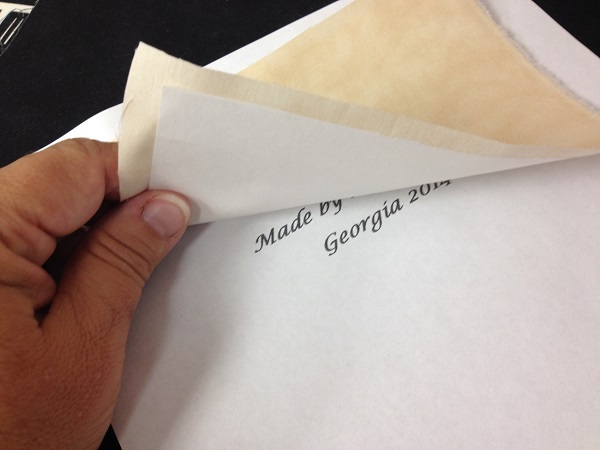
Using a window or light box, place the stabilized fabric over the written information and use it as a guide. I don’t trace it exactly, although you could. Instead, I just use it as a guide, so that the words are the correct size and stay in a straight line. Following a guide also helps make sure no mistakes or errors occur.
Step 4:
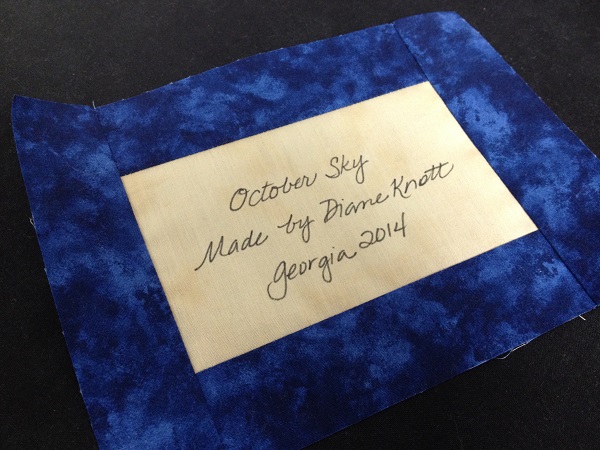
Now that the proper information is included, we can add a finishing border to the label. This can be done by adding a simple strip of fabric (scraps from the front of the quilt) that are cut 1 1/2″ wide. Trim them to the proper length once they are sewn on.
[box type=”shadow”]
Love finding ways to repurpose your extra fabric? You should check out the Bluprint class Big Techniques from Small Scraps, where you’ll make six small scrappy quilts along with learning new skills, like needleturn appliqué. Then download or FREE guide, Save Those Scraps! A Scrap Quilting Handbook, for even more fun tips, tricks and project ideas!
[/box]
Step 5:
Press the border strips toward the back of the label, so that the edges are nice and crisp with no raw edges showing.
Step 6:
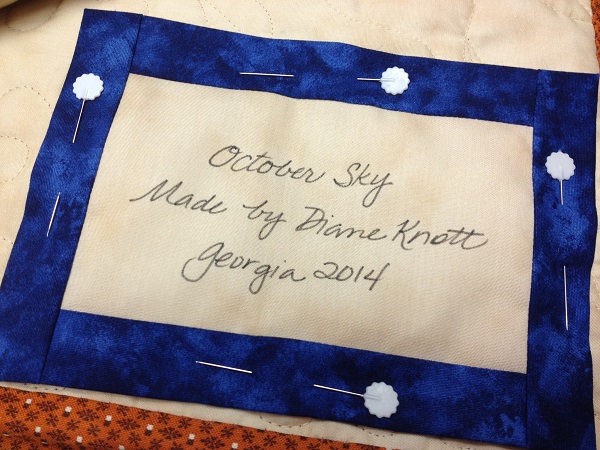
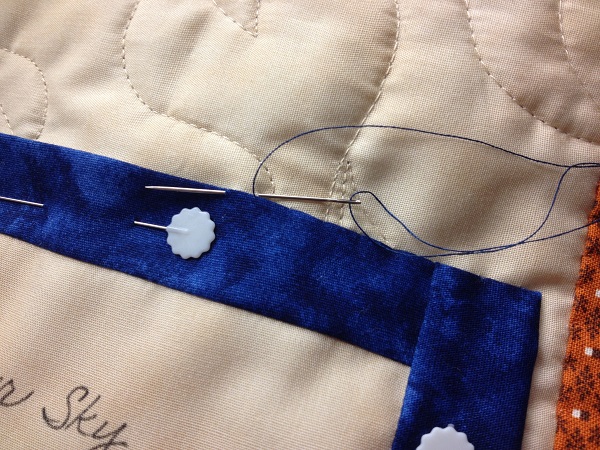
Pin the label in place on the lower corner of the quilt. Then, appliqué it in place using a slip stitch that will be invisible. Take care not to let your stitches go all the way through the quilt because you want to avoid them showing on the front of the quilt.
There you have it! Your quilt is marked with a beautiful and personalized label! Another fun idea would be to add a leftover block from the quilt. Really, this is your chance to get creative and make the label look like it belongs on that particular quilt.
With a little planning, and some simple steps, you can label your quilts so that their important information is always available to whomever has the quilt!
Share tips, start a discussion or ask one of our experts or other students a question.
No Responses to “Signed, Sealed, Delivered: Making A Quilt Label That Lasts”