Unless you’re going to knit blankets and scarves for the rest of your life, you have to add increasing and decreasing to your knitting skills. It can be intimidating at first, but once you learn how, no pattern is too complicated for you!
You already learned how to knit two together to make a decrease that leans to the right. Now, learn how to make the decrease lean to the left. Knowing both types of decreases comes in handy, especially when you’re knitting something like a sweater that needs to have equal decreases on both sides. (You are definitely on your way to sweater-knitting territory after this!)
Don’t worry about determining when the decrease should slant to the left and when it should slant to the right — unless, of course, you’re designing your own pattern. If you’re following a knitting pattern, the pattern will tell you when to ssk, k2tog, and make any other adjustments.
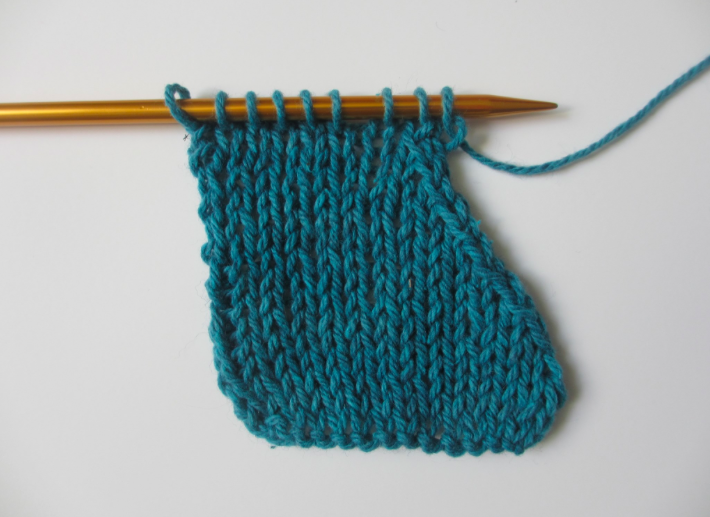
How to Slip, Slip, Knit (SSK)
For my swatch, I worked in stockinette stitch. Remember that this is slip, slip, knit so the decrease will always be worked on the knit side. (There are also decreases you can work on the purl side, but we won’t worry about that right now.)
If you’re following along with my swatch, this is the pattern I followed:
Cast on 15 sts.
Row 1: Knit.
Row 2 and all even-numbered rows: Purl.
Row 3 and all remaining odd-numbered rows: K1, ssk, k across the row..
And now for the ssk: In Row 3 after you k1, put your right-hand needle into the next stitch, just as you would if you were going to knit it. Then slide that stitch right over to the right-hand needle — no wrapping or actual stitching involved. (This is also what you’d do if your pattern told you to “slip a stitch knitwise.”)
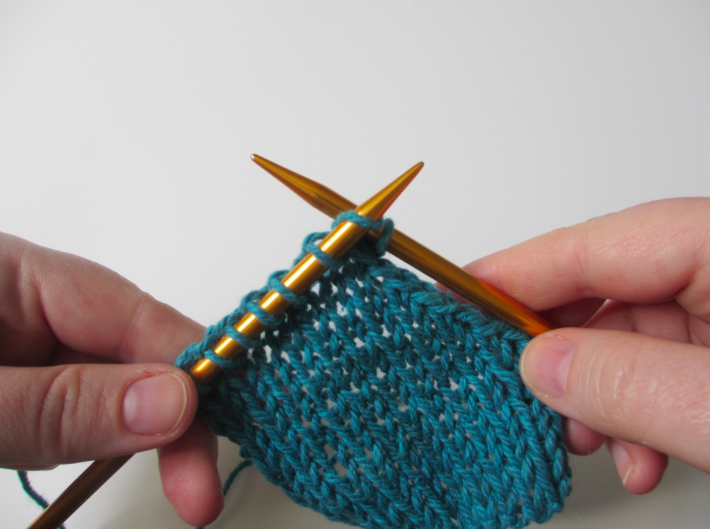
Here’s what your right hand needle looks like after you slip that stitch knitwise. You’ll have the stitch that you knit, followed by the slipped stitch.
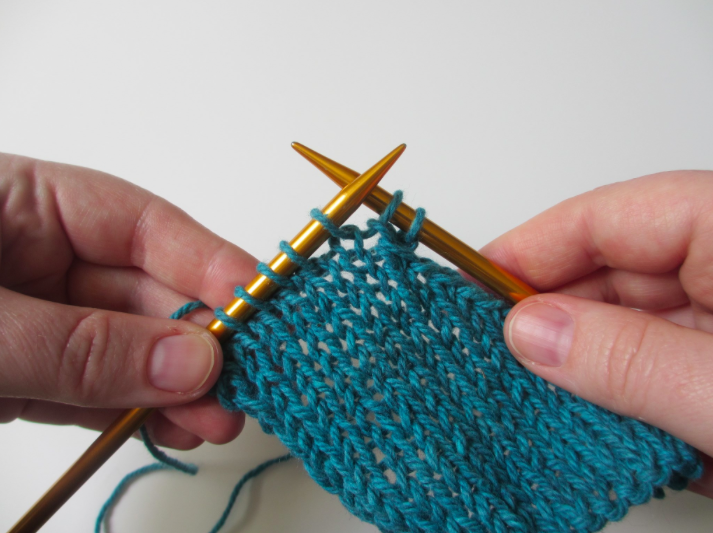
Remember we’re doing a slip, slip, knit, so we’re going to slip one more stitch.
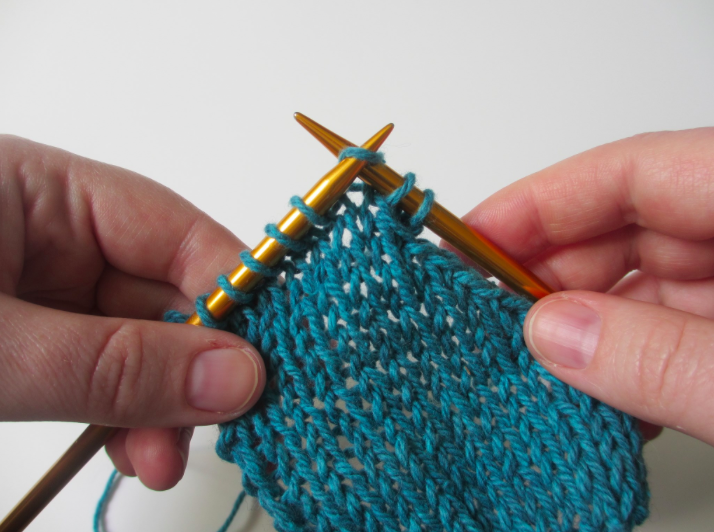
And now you should have three stitches on your right needle: the first one you knit, one slipped stitch knitwise, and another slipped stitch knitwise.
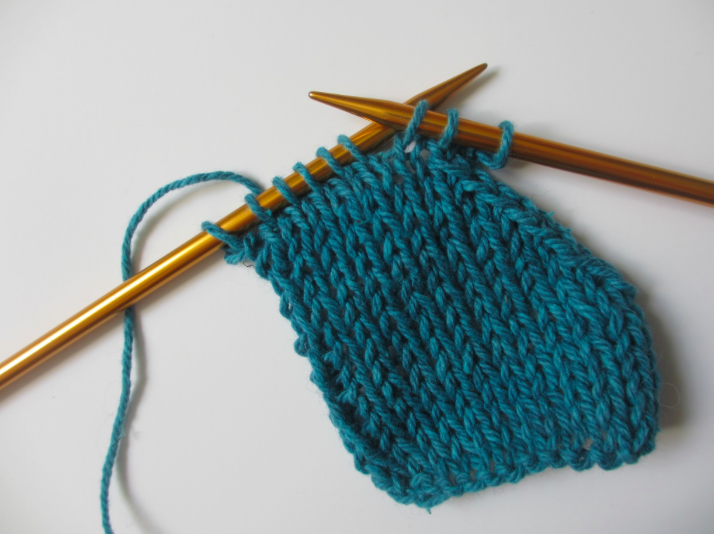
Here’s where it gets a little tricky. You’re going to knit the two stitches off the right hand needle to make the decrease. Here’s how: Take your left needle and put it through the front of the two stitches you just slipped. The left needle will be in front of the right needle.
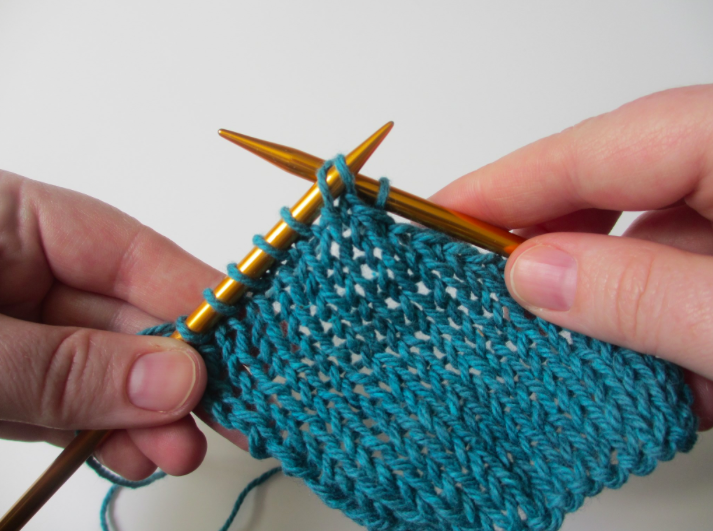
Knit those two stitches together, then drop the two stitches from the needle.
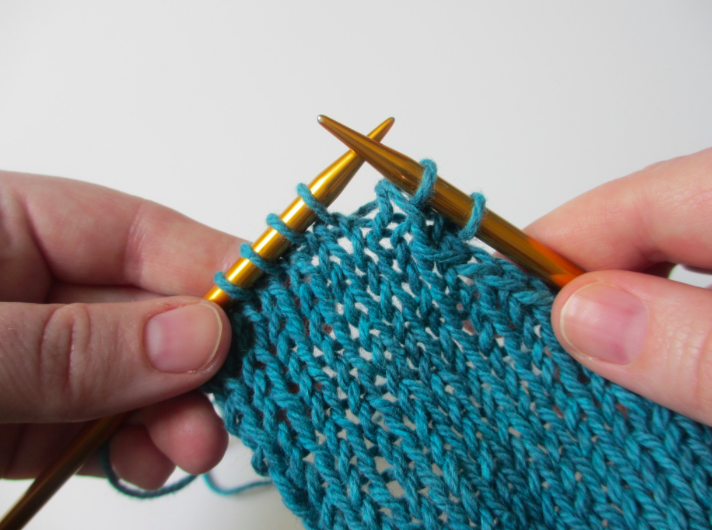
Continue across the row as instructed in the pattern. (In the case of the swatch, just k across the row.)
Continue practicing on the swatch, purling on the wrong side and making the ssk on the edge of each right side row. Eventually, your swatch will start to look like a right-angled triangle.
Want to learn all the increases and decreases with help from a pro? Take Stefanie Japel’s Knit Lab class, and she’ll walk you through each and every step. (Bonus: you’ll finish the class by making a pretty lacy keyhole scarf!)

Share tips, start a discussion or ask one of our experts or other students a question.
No Responses to “How to Slip, Slip, Knit (SSK)”