
Of course you’ve tried a doughnut in your lifetime. But have you ever tried learning how to make doughnuts at home from scratch?
When it comes to cooking, many people suffer from “fear of frying” as it seems difficult, dangerous, and unhealthy. But really, these fears ought not hold you back from giving making doughnuts a try — at least once.
For one thing, as long as you have a decent pot for frying and a thermometer, it’s actually quite easy to do. As for the health concern? Well, it is true that deep-fried doughnuts will never qualify as health food, but when made at home, you have control over the quality of the ingredients that go into your batter. And, the way in which freshly fried doughnuts feed your very soul is certainly worth an occasional indulgence. This recipe, which yields a tender-crumbed doughnut with a crispy crust, is certainly worth treating yourself to.
Homemade doughnuts are fun to make, extremely fun to decorate, and give you a definite sense of accomplishment. So get rid of that fear and let’s start frying.

Recipe notes and FAQs
What type of doughnuts are these?
If you’ve ever been to a doughnut shop (commercial or boutique), you know that a large variety of doughnut flavors and styles exist, ranging from butter pecan to German chocolate to even avocado. Most doughnuts are variations of two basic types: cake or yeast. Cake doughnuts are the most dense type, with a delicate, tight crumb. Yeast (or “raised”) doughnuts are airy and light, such as a glazed doughnut from Krispy Kreme. Okay, there is a runner-up third type: choux doughnuts, which are also airy and light, but with a pronounced, custard-like flavor owing to eggs in the batter–a famous example would be the prettily piped French cruller.
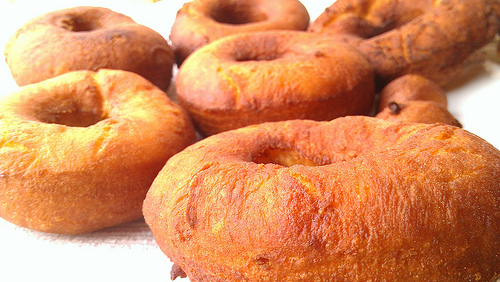
The recipe that follows is for a cake doughnut, which is slightly tangy owing to the sour cream in the batter. If you were to see this type of doughnut in a commercial setting, it would probably be called “old fashioned.”
Do I really need to monitor the temperature of the oil while frying?
Yes and no. Truthfully, it is possible to fry the doughnuts without the help of a thermometer. However, this is an imperfect art, and may yield inconsistent results. If the oil is too hot, the outside of the doughnuts will fry too quickly, making for gooey interiors; if the oil is not hot enough, the doughnuts will need more time to fry and may become leaden and soggy. Monitoring the temperature of the oil will ensure that you get consistent results: fully cooked, golden, crispy on the outside and soft on the inside doughnuts.

Is it “donut” or “doughnut”?
Kenneth G. Wilson, in The Columbia Guide to Standard American English, says: “Doughnut is the conventional spelling, donut a variant used in advertising or signs and as eye dialect.” While “doughnut” has been kicking around longer than “donut”, both are used interchangeably these days.
Why do doughnuts have holes?
So that the calories can fall out, of course! Just kidding. Although there are certainly a number of amusing anecdotes out there about how doughnuts got their holes, primarily its function is to ensure that the doughnut will cook through evenly, without a doughy center.
How to make doughnuts at home
Makes about 18 doughnuts, plus holes.
Equipment:
- Heat-safe thermometer for monitoring oil temperature
- Doughnut cutter (2 or 3-inch)
- Large pot or deep fryer, for frying
Ingredients:
- 4 cups all purpose flour, plus more for rolling
- 2 teaspoons baking powder
- 1/4 teaspoon salt
- 2/3 cup sour cream
- 1/3 cup buttermilk
- 3/4 cup sugar
- 3 large eggs
- 1 teaspoon vanilla extract
- 6 to 8 cups vegetable/canola oil, for deep frying
- Various icing, writing icing, or just confectioners’ sugar, for decoration
Step 1:
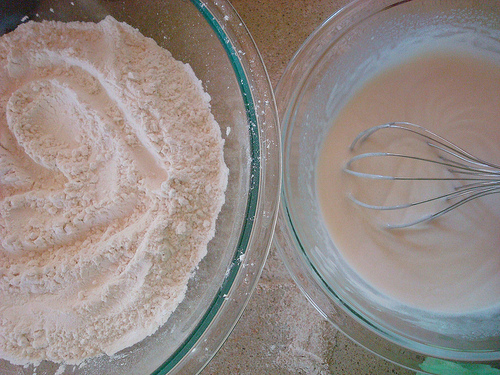
In a large bowl, sift together the flour, baking powder, and salt. Set aside.
Step 2:
In another large bowl, whisk the sour cream, buttermilk, and sugar, until smooth and combined.
Step 3:
Beat in the eggs and vanilla until just combined. If needed, scrape the sides of the bowl with a rubber spatula.
Step 4:
In 2-3 increments, add the flour mixture to this wet mixture, stirring with a wooden spoon until just combined. The dough will be quite sticky.
Step 5:
Refrigerate it for about 2 hours, or until completely chilled.
Step 6:
Turn the dough on to a very generously floured surface. Knead for 2 minutes, or until the dough is smooth and elastic. Return the dough to the fridge for another hour. This will make certain that the dough rolls out nicely and stays put once rolled out, rather than “springing” and sticking to your cutter.
Step 7:
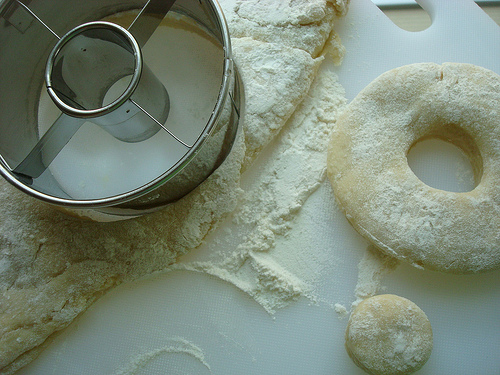
Turn the dough out on to a generously floured work surface. Roll the dough to about a 1/2 inch thickness. Using a floured cutter, cut as many doughnut shapes as you can from the rolled dough. When cutting, try not to twist the cutter too much, as a clean cut will ensure a better rise. Set the “holes” to the side–you’ll want to fry those, too.
Step 8:
Put the cut out rounds in the refrigerator while you heat the oil.
Step 9:
In a heavy medium pot or a deep-fat fryer, put enough oil to achieve a depth of about 4 inches; heat it to 375 degrees F.
Step 10:
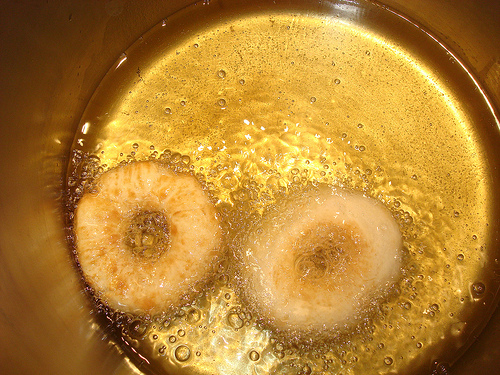
Gently transfer 2-3 doughnuts into the pot (however many will comfortably fit without bumping against one another). You don’t want to just plop them in the oil because if the oil spatters, it could hurt someone badly. But it shouldn’t be a problem as long as you do the transfer gently.
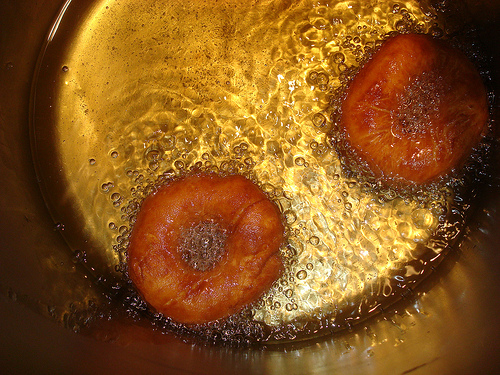
Step 11:
Fry until golden brown on each side. Turn with a slotted spoon (or one that has holes to drain oil through) once the first side is golden, and let the second side fry–this side will take less time. From being placed in the oil to finish will take less than 3 minutes per doughnut.
Step 12:
Remove with a slotted spoon and place on paper towels to blot excess oil. Repeat with remaining doughnuts, and doughnut holes (they take much less time to fry).
Step 13 (optional):
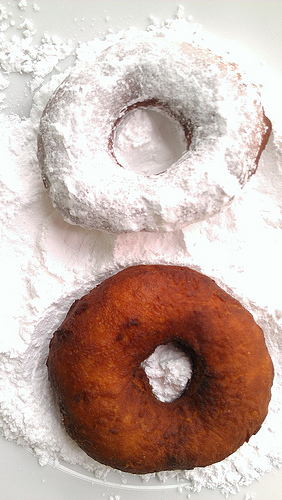
If you’d like to dust the doughnuts with confectioners’ sugar, dip them in a dish of confectioners’ sugar once while still warm, and once again directly before serving to ensure they look nice.
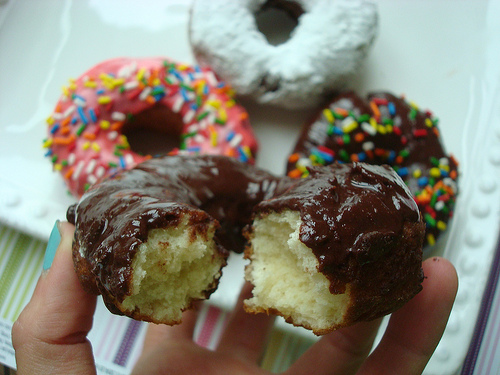
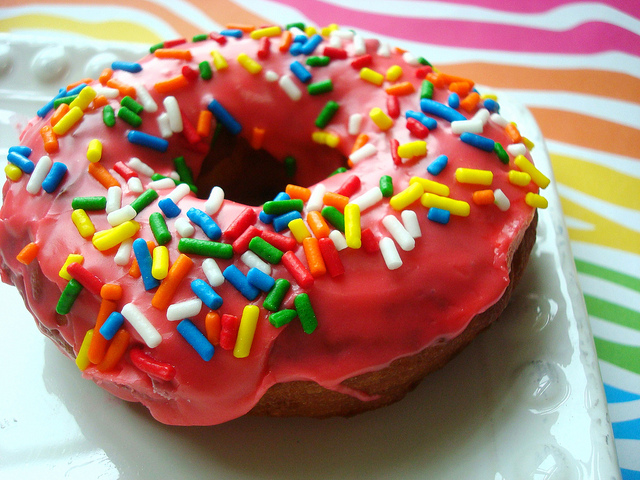
Alternately, you could top the doughnuts with a confectioners’ sugar glaze. You can make this by combining confectioners’ sugar and just enough milk to make it spreadable, adding food coloring or a small quantity of melted chocolate if desired. Or, you could even top with buttercream if you’re feeling particularly decadent. Of course, if you go any of these routes, you know you’ve got to add different types of sprinkles, right?
These doughnuts taste best the same day they are made; if you have leftovers, consider using them for overnight French toast or even bread pudding!
Share tips, start a discussion or ask one of our experts or other students a question.
No Responses to “How to Make Doughnuts at Home”