
Bokeh is something that most photographers love. It adds such a cool element to a photograph’s composition. But bokeh is tricky. The way it works is not exactly intuitive, making achieving it difficult. In fact, the how and what of the bokeh effect is somewhat disagreed upon amongst photographers. So, let’s stick with the essentials to get a feel for what the bokeh effect is in photography and how you can experiment with this intriguing style.
This video was shot in live view mode to illustrate the change in bokeh as the aperture changes. Bigger circles indicate a larger aperture. This video was shot with a 24-70mm lens from f/2.8 to f/22.
What is bokeh?
Simply put, bokeh is the blurring effect that results from going in and out of focus with the background. More specifically, it is the quality of the blur and includes circular shapes overlapping in the background. Using this style adds visual interest and helps bring focus to your subject.
Every lens will have a different quality of bokeh based on the optics.
How do you achieve the bokeh effect?
There are four keys to achieving bokeh. Using all four of them increases your chances of getting those sweet orbs in your background! Manipulate aperture, distance to subject, depth of field, and background highlights in order to get that bokeh style.
1. Aperture
Bokeh is easiest to achieve at very wide apertures. Using a lens with a minimum f/2.8 or wider aperture will help. However, using something like a f/1.2 makes it even easier to get clearly defined bokeh.
The type of aperture blades make a difference in the quality of your bokeh as well. A lens with many aperture blades will give you nice, round orbs in the background. A lens with fewer aperture blades will give you more of a polygon shape, like an octogon or a hexagon. This can still look really interesting, but generally, the rounder the shapes in your background, the softer and more dreamy looking your background will be.
2. Distance to your subject
If you don’t have access to a speedy, wide-aperture lens, you can also achieve this effect by increasing the distance to your subject and using a longer lens.
Using a longer lens compresses the background, throws it further out of focus and increases the chance that you will see bokeh.
3. Depth of field

Photo via Craftsy member Pattybearski
Depth of field is related to the aperture and the distance to the subject. These work hand in hand to decide exactly how out of focus your background will be. But generally speaking, the more out of focus, the bigger and more overlapped the bokeh circles will be.
4. Background highlights
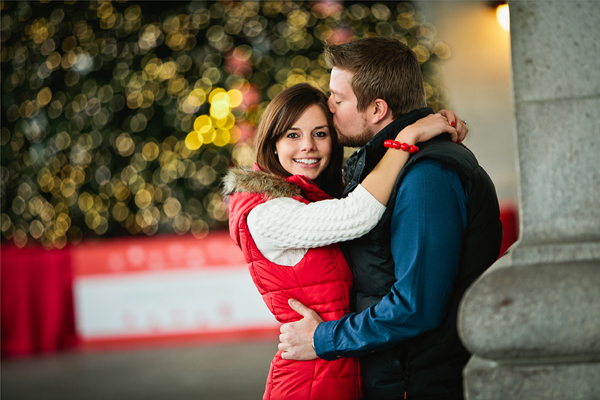
Part of the magic sauce that makes for creamy bokeh is having some contrast in your background, particularly highlights. This is why some of the best bokeh patterns come from shooting small Christmas lights or leaves that are backlit by sunlight.
Anything that has variation between light and dark areas and a quantity of contrast will work great. Bright spots and highlights tend to lend themselves well to a great bokeh look.
Learn more ways to use light to create stunning portraits in the Craftsy class Portraits With an On-Camera Speedlight.
Share tips, start a discussion or ask one of our experts or other students a question.
No Responses to “Blurred Lines: Learning the Basics of the Bokeh Effect”